How to Grow Peppers: The Ultimate Backyard Farming Guide to a Massive Harvest
How to Grow Healthy Pepper Plants: Backyard Farming Tips for Maximum Production
Most gardeners grow peppers wrong. They plant too late, water inconsistently, and wonder why their plants produce a handful of fruits instead of an avalanche. The truth is, peppers are not finicky; they just have specific needs, and once you understand them, they reward you generously.
This guide covers everything from seed to harvest. Whether you’re attempting your first backyard garden or you’ve grown vegetables for years and want to finally nail a bumper pepper crop, you’ll find everything you need right here. Expect practical, experience-backed advice, not fluff. By the end, you’ll know how to select the right varieties, how to plant seeds and start seeds at the correct time, troubleshoot problems before they spiral, and harvest peppers at peak flavor.
Let’s get into it.
Understanding the Basics: What Pepper Plants Need to Thrive
Before a single seed touches soil, you need a clear picture of what pepper plants actually require. Miss these fundamentals, and no amount of effort downstream will compensate.
Selecting the Right Pepper Varieties for Your Backyard
Pepper selection matters more than most gardeners realize. The variety you choose will shape your entire growing season, from how long you wait for fruit to whether your plants can handle your local climate.
Sweet and Mild Varieties: Bell Peppers and Banana Peppers
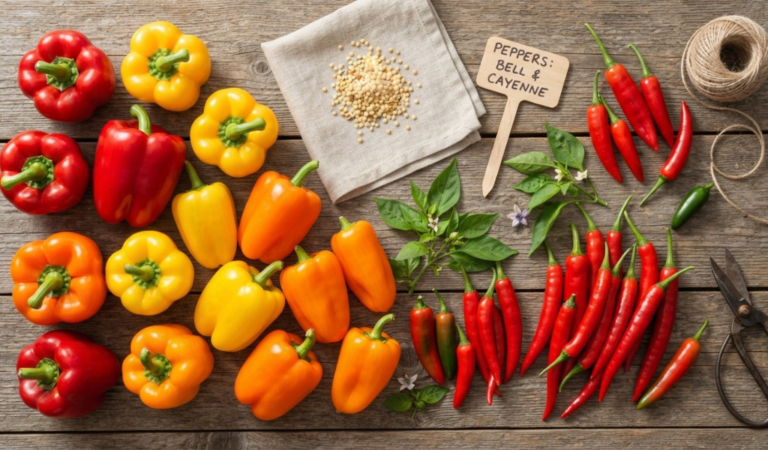
Bell peppers and banana peppers are ideal starting points for new growers. Bell peppers (available in green, red, yellow, and orange) are versatile in the kitchen and relatively forgiving in the garden. Keep in mind that red, yellow, and orange bells are simply fully ripened green bells, so patience is key. Banana peppers mature faster, making them a smart choice in shorter growing seasons.
Hot and Spicy Varieties: Jalapeños, Habaneros, and Ghost Peppers
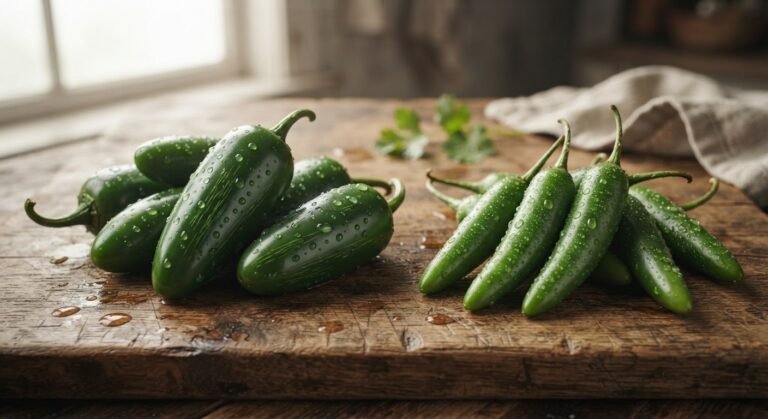
Jalapeños sit at around 2,500 to 8,000 Scoville Heat Units (SHU) and are one of the most productive backyard peppers you can grow. Habaneros, clocking in at 100,000 to 350,000 SHU, need more warmth and a longer season. Ghost peppers (Bhut jolokia), once the world’s hottest, demand a long, hot growing season and are best suited to experienced growers or those in warmer climates.
Ideal Climate, Sunlight, and Soil Requirements
Peppers are tropical plants by origin. Understanding this shapes every decision you’ll make.
The Golden Rule of Sunlight: Aim for 6 to 8 Hours Daily
Peppers need full sun, with no compromises. A location with fewer than 6 hours of direct sunlight daily will result in stunted plants and poor fruit set. South-facing garden beds are typically your best option in the Northern Hemisphere.
Preparing Rich, Well-Draining Soil (pH 6.2 to 7.0)
Soggy soil is a death sentence for pepper roots. Aim for a slightly acidic to neutral pH between 6.2 and 7.0. Before planting, work in generous amounts of aged compost. If your native soil is heavy clay, amend with perlite or coarse sand to improve drainage. A simple pH test kit, available at any garden center for under $15, will confirm you’re in the right range.
Step 1: Starting Your Pepper Seeds Indoors (The Secret to Strong Plants)
This is where most backyard gardeners either win or lose the season. Starting seeds indoors at the right time, in the right conditions, produces stocky, vigorous transplants. Rush it or skip it, and you’ll be playing catch-up all summer.
The Early Start Timing Matrix
Counting Back: Why February and March Are Crucial for Seed Sowing
Peppers need 8 to 10 weeks of indoor growing time before they’re ready to go outside. Count back from your last expected frost date, and you’ll typically land in February or March for most of the continental US. Starting in April feels natural, but it’s too late. Plants that late rarely reach full productivity before summer heat triggers blossom drop.
Creating the Perfect Germination Environment
Consistent warmth is the single most important factor in successful germination. Pepper seeds won’t germinate reliably in cool conditions.
Using a Seedling Heat Mat to Maintain 80°F to 85°F Soil
A seedling heat mat placed under your seed trays maintains soil temperatures between 80°F and 85°F, which is the sweet spot for pepper germination. At this temperature, most varieties sprout within 7 to 14 days. Without supplemental heat, germination can take three to four weeks, or fail entirely.
Managing Moisture and Preventing “Damping-Off” Fungus
Keep your seed-starting mix consistently moist but never waterlogged. Overwatering invites damping-off, a fungal disease that causes seedlings to collapse at the soil line overnight. Use a spray bottle rather than pouring water directly, ensure trays have drainage holes, and always water in the morning so excess moisture evaporates during the day.
Lighting and Nutrients for Baby Seedlings
Once seeds sprout, light becomes the priority.
Choosing Grow Lights Over Window Sills to Stop Leggy Growth
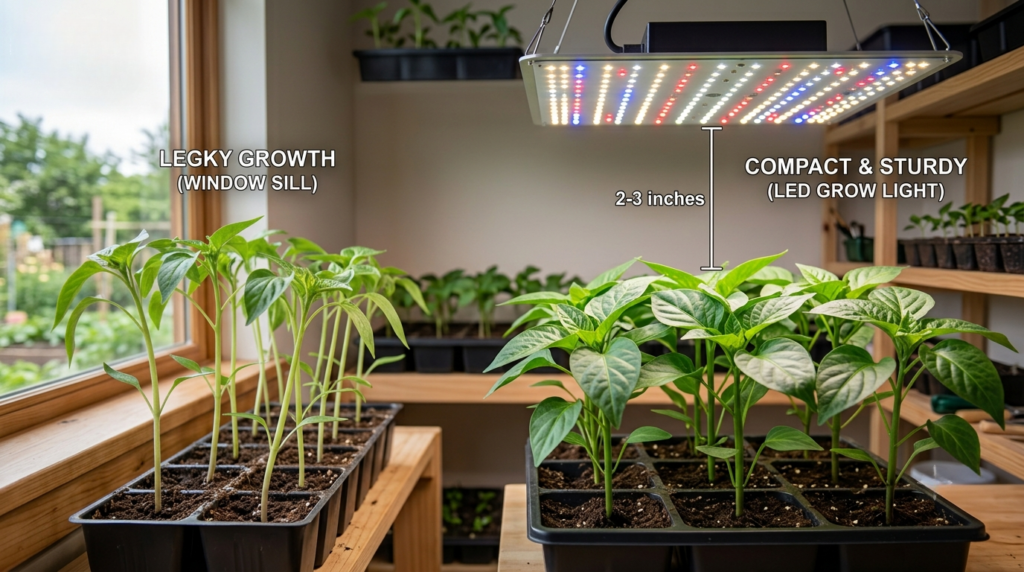
A sunny windowsill is not enough. Even south-facing windows in February deliver insufficient light intensity, and seedlings stretch toward the glass, becoming tall, weak, and floppy. A full-spectrum LED grow light positioned 2 to 3 inches above the seedlings for 14 to 16 hours per day produces compact, sturdy plants. The investment, typically $30 to $60 for a quality setup, pays back tenfold in plant health.
Feeding True Leaves with Weak Organic Fish Emulsion
Hold off on fertilizing until the second set of true leaves appears (not the initial seed leaves, known as cotyledons). At that point, dilute organic fish emulsion to about 25% of its recommended strength and apply weekly. Over-fertilizing young seedlings causes more harm than benefit.
Step 2: Moving Your Peppers Outdoors Safely
Transitioning indoor-grown seedlings directly to the garden is a shock the plants often don’t recover from fully. The process of hardening off bridges that gap.
The Hardening Off Process: Preventing Transplant Shock
A 7-Day Timeline for Introducing Seedlings to the Elements
- Days 1 and 2: Set seedlings outside in a sheltered, shaded spot for 1 to 2 hours, then bring them back indoors.
- Days 3 and 4: Increase outdoor time to 4 hours, introducing brief periods of indirect sunlight.
- Days 5 and 6: Allow 6 to 8 hours outside with direct morning sun.
- Day 7: Leave plants outside for a full day in their intended planting location.
After this process, your plants are ready for permanent outdoor planting.
Soil Preparation and Outdoor Spacing
Why You Must Wait for Nighttime Temperatures to Stay Above 55°F
Cold nights are more damaging than cold days. Soil temperatures below 55°F slow root development dramatically, and temperatures below 50°F can cause permanent cellular damage in peppers. Check a 10-day forecast before transplanting. When nighttime lows are consistently above 55°F, you’re safe to plant.
Proper Planting Spacing: 12 to 18 Inches Apart
Space standard varieties 12 to 18 inches apart in rows 24 to 30 inches apart. Crowding reduces airflow, encourages fungal disease, and creates competition for nutrients. Larger varieties like bell peppers benefit from the wider end of that spacing range.
Step 3: Crucial Care Tips for Maximum Pepper Yields
Growing peppers well is largely about consistency. The plants that produce the most fruit are the ones that never experience dramatic swings in water, nutrients, or temperature.
Master the Art of Watering Peppers
The Danger of Uneven Watering: Avoiding Blossom-End Rot
Blossom-end rot, the dark, sunken patch that ruins developing peppers, is almost always caused by inconsistent watering. This disrupts calcium uptake even when calcium is present in the soil. Water deeply and regularly, aiming for approximately 1 to 2 inches per week, depending on temperatures. Use a drip irrigation system or soaker hose to deliver water directly to the root zone.
Why Mulching with Straw or Wood Chips Keeps Roots Happy
A 2 to 3 inch layer of straw or wood chip mulch around the base of each plant does three things simultaneously: it retains soil moisture, moderates soil temperature, and suppresses weeds. Apply it after transplanting and refresh it mid-season.
The Two-Phase Organic Fertilization Strategy
Phase 1: High-Nitrogen Feeds for Lush Leaf Growth
During the first 4 to 6 weeks after transplanting, feed plants with a balanced fertilizer leaning toward nitrogen (N). Nitrogen drives vigorous vegetative growth, giving plants the size and structure needed to support heavy fruit loads later.
Phase 2: Switching to High-Phosphorus “Bloom” Feeds When Flowers Appear
Once flowers emerge, switch to a high-phosphorus, low-nitrogen fertilizer, which is often labeled as a “bloom” or “fruiting” formula. Continuing nitrogen-heavy feeds at this stage pushes leafy growth at the expense of fruit production.
Pruning and Support Structures
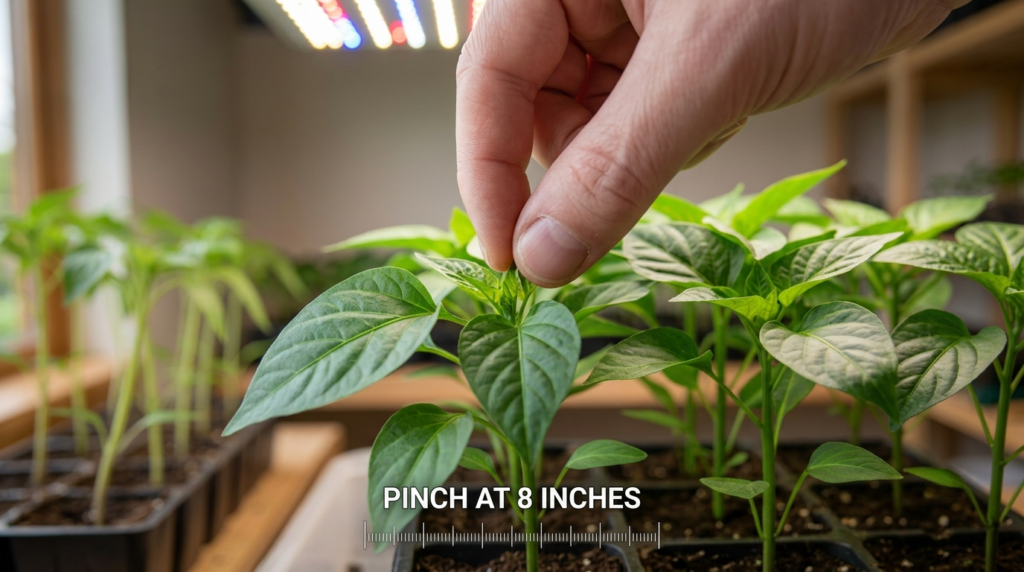
Pinching the Growing Tips at 8 Inches for Bushier Plants
When seedlings reach about 8 inches tall, pinch out the main growing tip. This forces the plant to branch out rather than grow straight up, resulting in a bushier structure with more flower-bearing stems, and ultimately more peppers.
Staking and Caging Heavy-Fruiting Varieties
Large-fruiting varieties like bell peppers and poblanos can become top-heavy as fruits develop. Install a simple tomato cage or stake each plant at transplanting time, rather than waiting until it is loaded with fruit. Securing the plant early avoids root disturbance later.
Step 4: Container Gardening: How to Grow Peppers in Pots
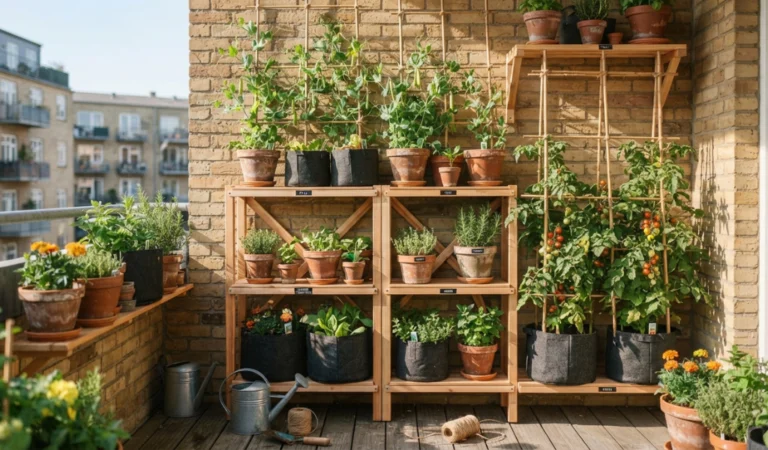
No backyard? No problem. Peppers are among the most container-friendly vegetables you can grow, producing impressive harvests on patios, balconies, and rooftops.
Choosing the Right Container Size and Material
Why a 5-Gallon Minimum Pot Size Prevents Stunted Growth
Root space drives above-ground productivity. A container smaller than 5 gallons restricts root development, limits water and nutrient disposal, and results in stunted plants with poor yields. For larger varieties like bells, aim for 7 to 10 gallons. Unglazed terracotta pots dry out quickly, so consider fabric pots or double-walled plastic containers to retain moisture more effectively.
Managing Fast-Drying Soil in Pot-Grown Peppers
Daily Summer Watering Routines for Container Peppers
Container soil dries out significantly faster than in-ground beds, especially during summer heat. In temperatures above 85°F, pot-grown peppers may need water once or even twice daily. Check soil moisture by inserting your finger 2 inches into the soil; if it feels dry, water thoroughly until it drains from the bottom. Never let container peppers sit in standing water.
Step 5: Troubleshooting Common Pepper Pests and Diseases
Even a well-managed garden faces pest and disease pressure. Catching problems early is the difference between a minor inconvenience and a lost crop.
Identifying and Defeating Backyard Garden Pests
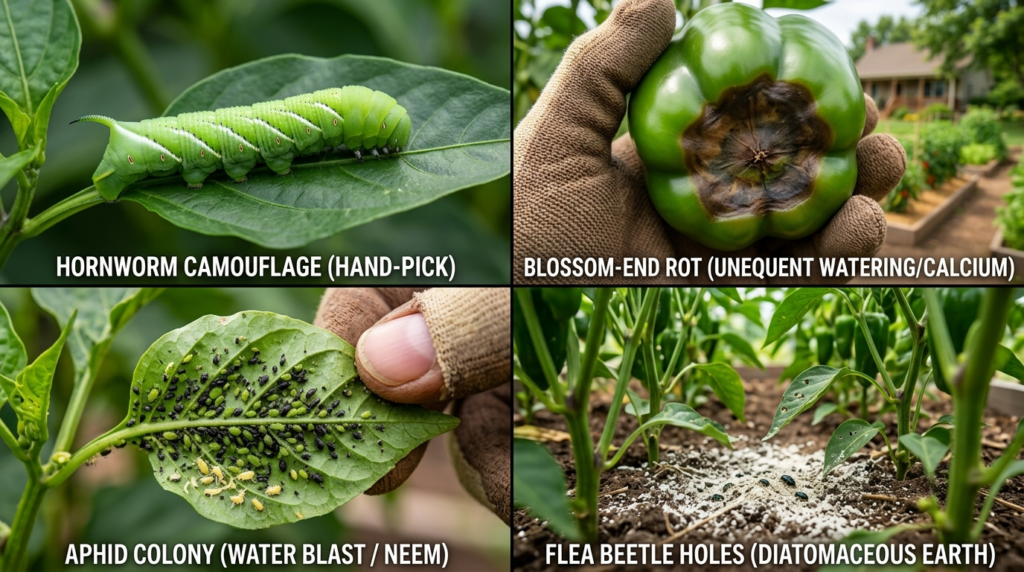
Aphids, Flea Beetles, and Hornworms: Organic Pest Control Solutions
- Aphids: These pests cluster on new growth and the undersides of leaves. A strong blast of water from a garden hose dislodges most colonies. For persistent infestations, neem oil spray applied in the evening works effectively.
- Flea Beetles: These leave tiny, scattered holes in leaves. Row covers early in the season prevent establishment, while diatomaceous earth applied around the base of plants discourages them.
- Hornworms: These are large enough to hand-pick. Check plants daily in midsummer, looking for dark frass (droppings) on leaves as a sign of their presence.
Preventing Soil-Borne and Fungal Diseases
Crop Rotation Strategies: Avoiding Areas Preoccupied by Tomatoes or Eggplants
Peppers, tomatoes, eggplants, and potatoes all belong to the Solanaceae family and share common soil-borne diseases, including Fusarium wilt and Verticillium wilt. Avoid planting peppers in any bed that hosted these crops in the previous two to three seasons. Rotate to a different area of the garden, and always clean and sanitize garden tools between uses.
Step 6: Harvesting and Storing Your Backyard Bounty
All the effort of the season culminates here. Harvesting at the right time, and in the right way, determines both flavor quality and how many future fruits your plant produces.
Knowing Exactly When to Pick Your Peppers
Green vs. Colored: How Maturation Affects Flavor and Heat
Peppers can technically be harvested at any stage once they reach full size. Green peppers are fully formed but not yet ripe; they tend to be slightly more bitter and, in hot varieties, can carry more intense heat. Allowing peppers to ripen fully to red, orange, or yellow increases their sugar content, deepens their flavor, and, for some hot varieties, increases heat. The tradeoff is time, as achieving full color can take an additional 2 to 4 weeks beyond green maturity.
Proper Harvesting Techniques to Protect the Plant
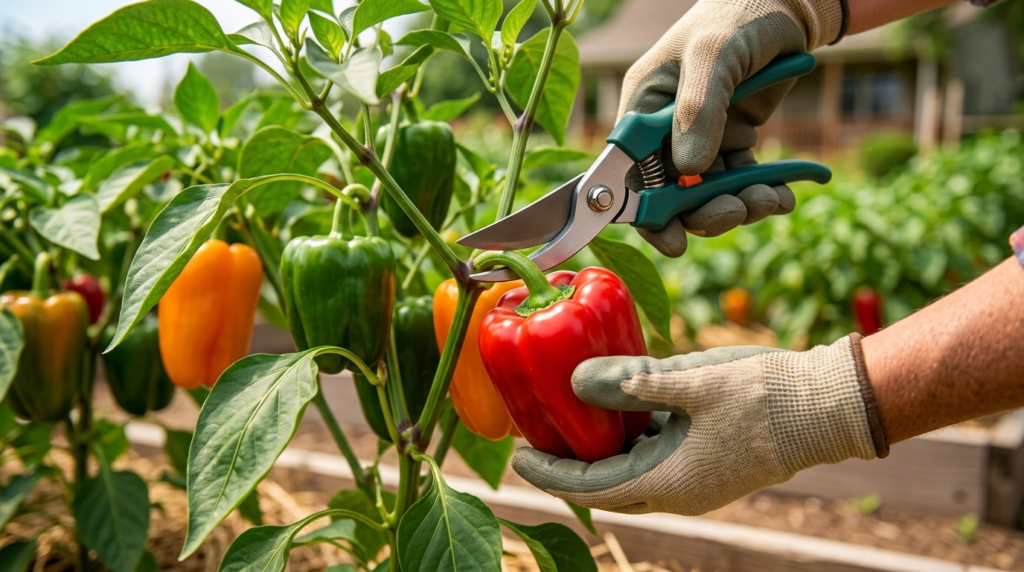
Why You Should Always Use Pruning Shears Instead of Pulling by Hand
Yanking peppers off by hand seems efficient but frequently snaps branches, damages stems, or uproots entire plants, especially in sandy or loose soil. Always use clean, sharp pruning shears to cut the stem approximately half an inch above the fruit. This protects the plant structure and encourages continued production throughout the rest of the season.
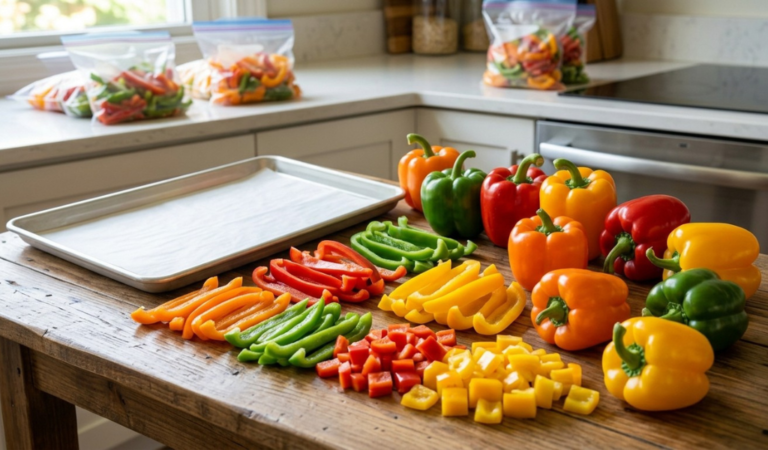
Store freshly harvested peppers in the refrigerator for up to two weeks. For long-term preservation, peppers freeze exceptionally well: slice them, spread them on a tray to freeze individually, and then transfer them to freezer bags.
Your Best Pepper Harvest Starts Now
Growing a genuinely impressive crop of peppers isn’t about luck; it’s about executing the right actions at the right times. Start seeds in February or March. Give plants full sun and well-draining soil. Water consistently, fertilize in two distinct phases, and stay ahead of pests before they establish. Every step in this guide exists because it makes a measurable difference in your harvest.
The most important move you can make right now? Decide which varieties you want to grow, order your seeds, and mark your calendar for seed-starting day. Everything else flows from that first decision.
Your peppers are waiting.