Tomato Root Rot Treatment: How to Identify, Fix, and Save Your Plants
Tomato Root Rot Treatment: Treating Guide
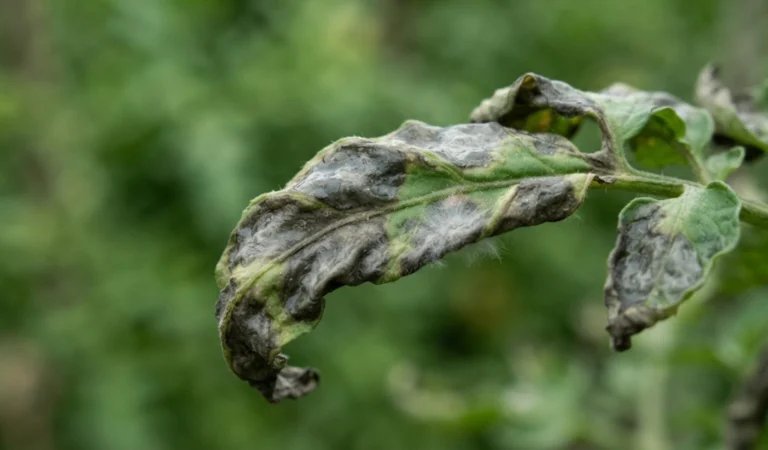
One week your tomato plant looks fine. The next week the leaves droop in the afternoon, turn yellow, and the whole plant seems to give up. You water more because you think it is thirsty, and it only gets worse. If this sounds familiar, you may be dealing with root rot, and the right tomato root rot treatment can still save many plants if you move fast. The damage is hidden underground, which is why so many gardeners notice it late.
This guide shows you what causes the problem, how to spot it early, and exactly what to do step by step. It also covers how to fix the soil so the trouble does not come back. Root problems are easy to mix up with other garden troubles, so keep a clear head and check the roots before you decide anything. A gardener might spend weeks on aphid control in peppers, for example, only to find out the real trouble in the next bed over was soggy soil. Let us start with the basics so you know what you are fighting.
What Is Tomato Root Rot? (Causes and Symptoms)
Root rot is a disease where the roots slowly die and turn to mush. Roots are the plant’s mouth and its lungs. They drink water and they also need air. When soil stays soaked for too long, the air pockets fill with water and the roots begin to suffocate. Weak roots then become easy targets for soil fungi that were just waiting for the chance. The plant cannot pull up water or food, so the leaves suffer even though the soil is wet. That is why a plant with root rot often looks like it is dying of thirst while sitting in a puddle.
The problem shows up in garden beds, raised boxes, and pots. Heavy clay soil, pots with no drainage holes, and a heavy hand with the hose are the most common reasons. Cool and rainy spells make it worse, and so does planting too early in cold ground.
Fungal Pathogens: Pythium, Phytophthora, Rhizoctonia, and Fusarium
A few well known fungi and fungus-like organisms cause most cases of tomato root rot. Pythium is one of the biggest troublemakers. It loves wet soil and attacks young seedlings and fine root hairs. Seedlings can pinch off at the soil line and fall over, which gardeners call damping off. Phytophthora is a close cousin and is a water mold that spreads when the soil is flooded. It can rot the roots and also climb the stem as a dark, soggy lesion near the base.
Rhizoctonia is a soil fungus that makes brown, sunken patches on the stem and roots, especially in cool and damp ground. Fusarium works differently. It clogs the plant’s water tubes from the inside, which causes yellowing on one side of the plant and then wilting. Fusarium can sit in the soil for years, so it is harder to clear out.
You do not need a lab to start fighting these. All four are helped by the same thing, which is wet soil with poor air. Fix the wetness and you take away most of what they need.
Early Warning Signs: Wilting, Yellowing Leaves, and Stunted Growth
The first clues show up above the ground. The plant wilts during the warm part of the day even though the soil is damp. It may perk up at night and then droop again the next afternoon. Lower leaves turn yellow, often starting at the oldest ones and moving up. Growth slows down, new leaves stay small, and flowers may drop before they make fruit.
My cousin Rina grew tomatoes in large pots on her balcony and watered every single morning without checking the soil. By midsummer her plants were pale and short. She assumed they needed more food and added fertilizer, which only stressed the roots further. Once she slid one plant out of its pot, the truth was plain. The roots were dark and slimy.
If you see these signs, do a quick test. Push a finger two inches into the soil. If it is still wet and the plant is wilting, suspect the roots instead of reaching for the watering can.
Below-Ground Signs: Black, Mushy Roots and Foul Odors
The real proof is under the soil. Gently pull back some dirt near the base, or slide the plant from its pot if it is in a container. Healthy tomato roots are white or light tan and feel firm. They snap a little when you bend them. Rotten roots look brown or black and feel soft and slippery. The outer skin may slide off, leaving a thin, stringy core behind.
Smell the soil too. A sour, musty, or rotten egg odor is a strong sign of rot. Healthy soil smells fresh and earthy. You may also see a dark, water-soaked area at the base of the stem, and the plant may wobble when you touch it because the roots no longer hold it well. If you find even a few firm white roots, there is hope, and that brings us to the big question.
Can You Save a Tomato Plant with Root Rot?
The honest answer is that it depends on how far the damage has gone. If more than about half of the roots are still firm and white, the plant has a fair chance. Tomatoes are good at growing new roots, and they will even sprout fresh roots along the buried part of the stem. That gives you something to work with. A plant that is only a little wilted, with some yellow leaves and a stem that is still hard and green, is a good candidate for rescue.
If the roots are almost all black and mushy, and the base of the stem is dark and soft, the plant is very likely gone. In that case it is better to pull it out, throw it in the trash, and start again with a healthy plant. Do not put it in the compost pile because the fungi can survive and spread.
There is one more thing to think about, and that is time. If it is early in the season, a rescued plant has plenty of time to grow and still give you a harvest. Late in summer, a new transplant or a fresh start with a quick growing variety may serve you better than a long recovery. Take cuttings from healthy side shoots before you do anything else. A side shoot placed in a jar of water will grow roots in about a week, so even if the mother plant fails, you keep the variety.
The best advice is to act the same day you find the problem. Every day in wet soil gives the fungi more time to spread. The plan below walks you through the full rescue.
Step-by-Step Emergency Root Rot Treatment Plan
Think of this as plant first aid. You will dig up the plant, clean away the dead parts, treat what is left, and give it a better home. Set aside an hour and gather your supplies before you start. You will need clean pruners, a bucket, a hose or watering can, a fungicide, fresh potting mix, and a pot or a prepared spot in the garden.
Step 1: Unearthing the Plant and Assessing Root Damage
Start by loosening the soil around the plant with a garden fork so you do not slice through the roots. Lift the plant out with as much of the root ball as you can. If it is in a container, tip the pot on its side and slide the plant out gently. Do not yank it by the stem.
Shake off the loose soil and rinse the roots under a gentle stream of water. This washes away mud and lets you see what is going on. Look at the color and feel of every root. Firm and white means healthy. Brown, black, or slimy means rotten. Also look at the base of the stem for dark or soft spots.
Now count roughly how much is good and how much is bad. This tells you if the plant is worth saving. If you see plenty of healthy white roots, keep going. If almost everything is black, move to your backup plan of rooting a side shoot.
Step 2: Pruning Away Black and Soft Diseased Roots
Wipe your pruners with rubbing alcohol first so you do not spread the disease. Then cut away every root that is black, mushy, or slimy. Cut back to firm tissue, and it is better to cut a little extra than to leave bad parts behind. Dip the blades in alcohol between cuts if the rot is heavy.
Once the roots are trimmed, cut back some of the top growth to match. A plant with fewer roots cannot feed as many leaves. Remove about a third of the foliage, starting with the yellow and drooping leaves. Take off any fruit that is almost ripe if you can, or any large green fruit, so the plant can spend its energy on new roots.
Put all the diseased roots and leaves in a bag and throw them in the trash. Wash your hands and tools when you are done. Let the roots sit in the shade for a few minutes while you prepare the treatment.
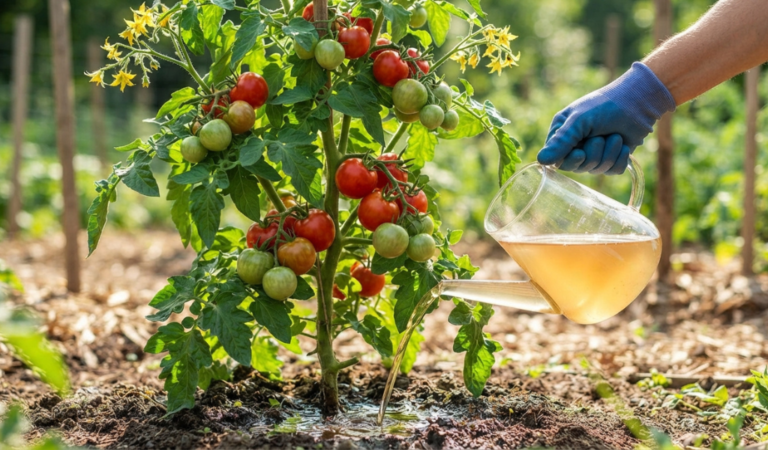
Step 3: Applying Fungicidal Drenches (Bacillus amyloliquefaciens or Copper)
A fungicide drench protects the clean roots and slows any leftover fungi. Two good choices for home gardens are a biological product made with Bacillus amyloliquefaciens and a copper based fungicide. The Bacillus product contains helpful bacteria that crowd out harmful fungi around the roots. It is gentle and works well as a preventive step and as a rescue step. Copper fungicides work by stopping fungal growth on contact, but too much copper can build up in soil, so use them with care and only as the label says.
Mix the product in a bucket with water at the strength written on the package. Soak the trimmed root ball for about ten to fifteen minutes. After replanting, pour a little more of the mix around the base as a drench. Some gardeners also use a hydrogen peroxide mix of one part three percent peroxide to about ten parts water as a quick root rinse, since it adds oxygen and kills some germs on the surface. It is not a cure on its own, but it can help.
Always read the label and wear gloves. Do not apply copper in the heat of the day, and never use more than the label allows. A stronger dose does not mean a faster rescue.
Step 4: Replanting in Fresh, Well-Draining Soil
The soil where the plant got sick is full of fungi, so do not put it back in the same spot unless you have changed it. For a pot, wash it with a mild bleach mix, rinse it well, and make sure the drainage holes are open. Fill it with fresh potting mix and blend in about a quarter perlite or coarse sand. The mix should feel light and fluffy and should crumble in your hand.
For a garden bed, pick a new spot if you can. If you cannot, dig out the bad soil, mix in plenty of compost and some coarse material, and make a small mound so water drains away from the stem.
Plant the tomato slightly deeper than before. Tomatoes grow new roots along the buried stem, which gives the plant a fresh start. Water lightly once to settle the soil, then let the top two inches dry before you water again. Place the plant in a spot with morning sun and some afternoon shade for the first week. Skip fertilizer for two weeks, because tender new roots can burn easily. New green growth in ten to fourteen days is a good sign that the rescue worked.
How to Fix Soil Waterlogging and Improve Drainage
Treating the plant is only half the job. If you ignore the soil, the rot will come back. Waterlogged soil is the root of the whole problem, so spend some time making it drain better.
Start with how you water. Most tomatoes need about one to two inches a week, but that changes with weather and soil. Water deeply and then wait. Check the soil with your finger or a cheap moisture meter before you add more. In pots, water until it runs out of the bottom and then let the pot drain fully. Never let a pot sit in a saucer full of water. In the garden, water in the morning so the top layer can dry during the day.
Next, work on the soil itself. Heavy clay holds water like a bowl. Mix in several inches of compost and a good amount of coarse sand or fine bark to open up the structure. Adding compost year after year slowly turns clay into a softer, crumbly soil that drains well and still holds some moisture. Avoid mixing sand into clay without compost, because that can set up like concrete.
Raised beds are a great fix for poor drainage. A bed that is at least eight to twelve inches tall lets extra water slip away and warms up faster in spring.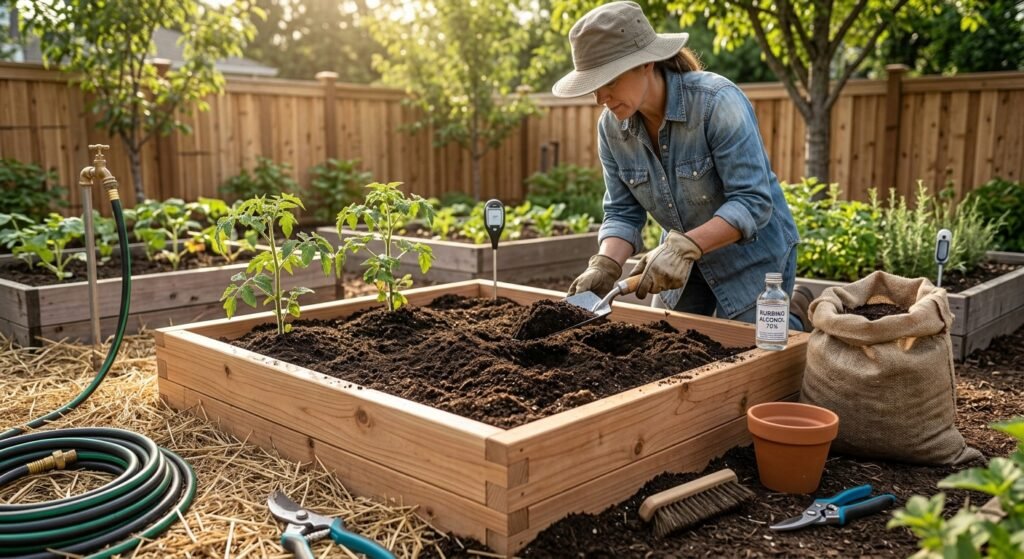 For container growing, choose pots at least five gallons in size for each plant, and use a quality potting mix instead of garden soil. Garden soil packs down in pots and drains poorly.
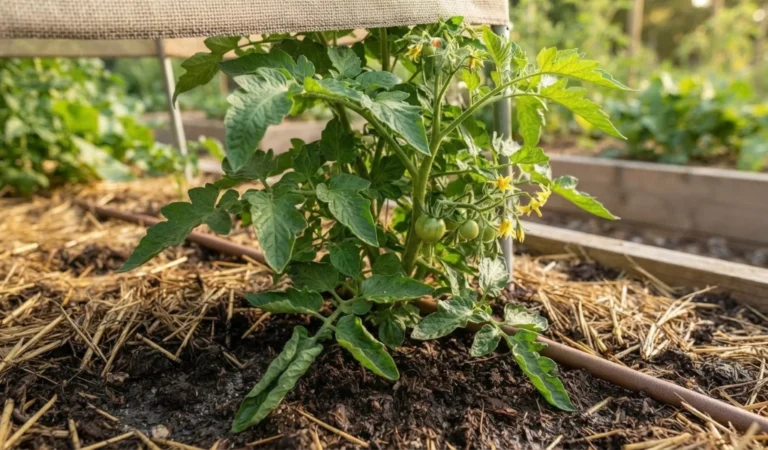
Mulch helps too, but keep it a couple of inches away from the stem. A layer of straw holds steady moisture and prevents splashing, but a thick wet pile touching the stem can trap dampness against the base.
Finally, plan ahead for the next season. Rotate your tomatoes so they do not grow in the same bed more than once every three years. Choose varieties with some resistance to Fusarium, which you will often see marked with an F on the plant tag. Wait to plant until the soil has warmed to at least 60 degrees, since cold wet soil is the perfect place for Pythium to thrive.
Final Thoughts
Root rot sounds scary, but it is one of the more fixable tomato problems when you catch it in time. Remember the main points. Wilting in wet soil is a clue to check the roots. Firm white roots are healthy and black, mushy ones are not. Cut away the bad parts, treat the rest with a fungicide drench, and replant in light, fast draining soil. Then fix your watering habits and your drainage so the problem does not return.
Do not wait until the plant is nearly gone. Go out to your garden today, check the soil moisture, and look closely at your tomatoes. If you found this guide helpful, save it for later, share it with a friend who loves growing tomatoes, and tell us in the comments what your plants looked like when you first saw the signs.
Frequently Asked Questions (FAQ)
How do I know if my tomato plant has root rot or just needs water?
Check the soil first. A plant that wilts when the soil is dry needs water and will perk up within hours. A plant that wilts while the soil is wet likely has root rot. Pulling the plant up and looking at the roots gives you the final answer.
How long does it take for a tomato plant to recover from root rot?
Most rescued plants show new growth within ten to fourteen days. Full recovery can take three to four weeks. Be patient and avoid heavy feeding during that time.
Can I use the same soil again after root rot?
It is best not to. The fungi can live in old soil for a long time. Replace it with fresh mix or, in a garden bed, dig out the bad soil and add new compost and coarse material. Rotating crops also helps.
Is hydrogen peroxide good for tomato root rot treatment?
It can help as a quick rinse because it adds oxygen and kills some surface germs. It will not cure severe rot on its own, so pair it with pruning, a proper fungicide, and better drainage.
Can tomatoes with root rot still produce fruit?
Sometimes, but the fruit is often small or poor in taste. Plants with weak roots cannot take up enough water and nutrients. If the fruit itself looks healthy, it is safe to eat. Throw away any fruit that is soft or moldy.
What is the best way to prevent root rot in pots?
Use pots with large drainage holes and a light potting mix with perlite. Water only when the top two inches feel dry and empty the saucer after watering. A pot of at least five gallons gives the roots room and holds a steadier level of moisture.
Does overwatering always cause root rot?
Not always, but it is the main trigger. Poor drainage, compacted soil, and cold weather can cause the same problem even with normal watering. The key is that the roots need air as well as water.